Cooking in general is done in every home every single day. It is one of those things that everyone knows even if not all everyone does it. At the most basic, cooking is applying heat to food before you actually eat it. It is the practice of making food with the help of heat, but that it does not mean only about changing food by heating. It is more than that. The people who make the food, the cooks, also differ on the way they prepare the food or the technique of adding all the flavors to make a delectable dish. Cooking may also be done without the help of heat but instead chemical reaction is used, in instances such as fish being cooked due to the acids from vinegar or lemon juice. Making food with the means of fire is the most common way.
When cooking, there are many different kinds of cookware that can be used. Because of this, there are many kitchen disasters that have happened by using the wrong cookware or too much information provided when preparing certain dishes. To clear up confusion, let us get to know the basic uses of the cookware as well as the right things to choose when cooking certain dishes. There are two basic heat applications in cooking food. Those two are the dry heat and the moist heat. Dry heat often uses oil and food that are being cooked in dry heat, usually fried or grilled. The cookwares used for this kind of cooking are pans and grills, unless you’re deep frying some yummy chicken meat. Moist heat, on the other hand, is a cooking process that involves water such as steaming or broiling. The cookware that should be used for dishes being prepared in this method should be pots and steamers so the liquid will never spill when it boils.
Types of Cookware
- Copper Cookware
- Cast Iron Cookware
- Hard Anodized Cookware
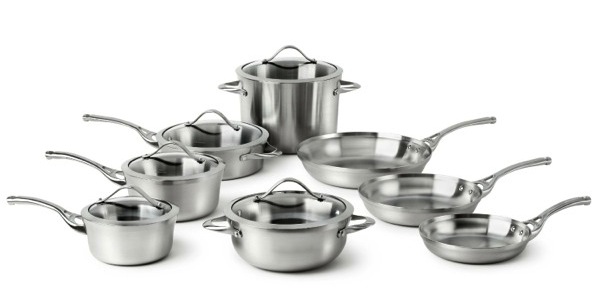
- Stainless Steel Cookware
- Non Stick Cookware
There are many different kinds of cookware being used in both dry heat cooking as well as moist heat cooking. Join us as we delve deeper and get to know some common cookware that you can find in your kitchen.
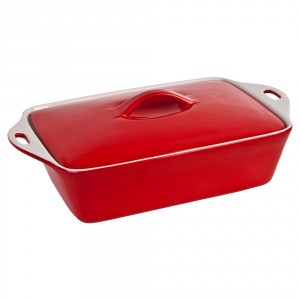 Casserole
It is a deep round pan with high sides and is made from many materials such as cast iron, glass or aluminum.
It often comes with a cover and depending on the material that is it made, it can be used on the stove or in the oven for one dish meals that can be served without removing the food from the casserole itself.
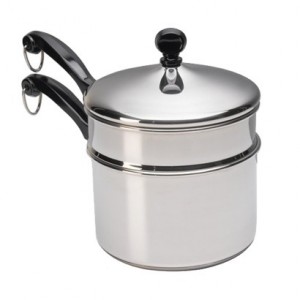 Double boiler
It is a cookware that consists of two pans where one shallow pan is placed on top of a larger pan that can surely fit the top when placed.
This pan is often used when melting chocolate or making delicate sauces. The bottom pan holds water that will be boiled so it can give off stem that will be used to cook or heat the food placed in the upper pan.
 Skillet/Frying Pan
It is a flat bottomed aluminum or iron pan with short sides that are sloped so as to allow easier tossing or turning of food with a ladle or spatula while cooking.
These pans are available with non-stick surfaces and these pans are also used for frying and saut?ing. Some comes with a cover and they are usually made of glass.
 Saucepan
Saucepans are round pots with sides that are high and straight while the bottom part is flat. It is used for many purposes like making soup, cooking vegetables and making sauces.
There are other saucepans with other styles too and they are used for special purposes. These cookwares are made of sturdy material and very heat responsive like lined copper or aluminum plated.
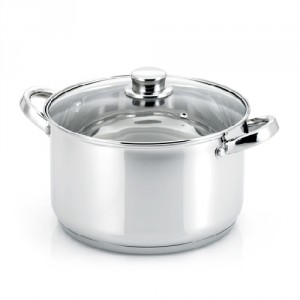 Stockpot
Stockpots are tall, deep pots with straight sides. The height of these pots is about double compared to its width.
It has two handles that are big on either side that makes holding it easier. It is commonly used for simmering huge amounts of liquids and is also used for making thick soups or boiling pasta.
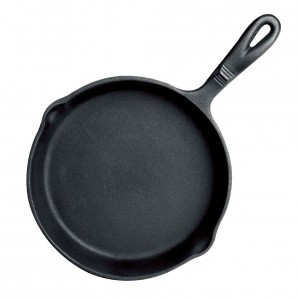
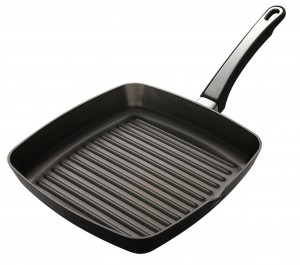 Grill Pan
Grill pans are heavy metal pans that have even ridges on the bottom that is close to an actual grill when you are cooking meat and different foods.
They can be bought as shallow or with deeper sides that sometimes resembles a frying pan. The ridges allow oil and liquid o fall from the meat while it is being cooked and prevents the food to be steamed during the process. The materials in which grilling pans are made are good in distributing heat evenly in the bottom of the pan thus making the food to be cooked thoroughly and evenly.
There are many other cookwares available out there that are not mentioned and all of them equally important and we just named some of the common wares found in the kitchen. Now, if you are having a hard time choosing what is the best cookware for your kitchen, here are some tips you should consider before actually purchasing one.
Things to Consider
Heating conduct
There are some metals that are better heat conductors compared to others. For example, copper is a great heat conductor compared to stainless steel. Knowing this, it gives you better information as to what cookware to buy if you want your food to be cooked evenly.
Price
The money you pay for your cookware is one of the determining factors for the stuff that you get. It is best to follow and buy what you can afford.
Durability
There are certain types of cookware that can maintain their appearance and will actually last longer compared to others such as stainless steel.
Reactivity
There are also certain kinds of cookware that reacts to various kinds of food. For example, aluminum reacts when acidic foods are being cooked in it. It also means that the food may also absorb some of the metal so you should be careful in choosing what you buy.
Therefore, if you are a professional cook, a cooking aficionado, or you are still starting to learn how to cook, it is best to know the basics of cookware so the food that you will be serving will be prepared in the best way possible and that it will be healthy, safe and delectable.
Cookware Top Brands
There are many different brands that create cookware. Be sure to check out our Cookware brands to find out about them all.